I love spinach. I also love poached eggs. And I love them in a combo.
So tonight, I had some fresh spinach, some eggs, some salami, a few pieces of whole wheat bread and some salami in the fridge.
The result? Il Popeye Benedicto!
I fried the salami a little bit in a hot cast iron skillet with just a little bit of olive oil. Removed them. Mike used the same skillet to make some excellent home fries. When they were removed, I wilted the spinach in the same hot skillet, in a little olive oil, with the burner off. There was enough heat to wilt it. Meanwhile, I boiled a little bit of water in a pot, plunked in a little bit of vinegar when it was at a boil, put in two eggs and let them float for about 4 minutes. Toasted some of the whole wheat, topped each slice with half of the spinach. Then placed two salami slices on that, and then one egg. Topped the whole thing off with a few small slices of Monterrey jack cheese, and voila...Il Popeye Benedicto served along side of home fried potatoes.
It was so yummy, I forgot to take a picture!
-J
Showing posts with label cheese. Show all posts
Showing posts with label cheese. Show all posts
Thursday, February 23, 2012
Sunday, January 8, 2012
Ham and Cheese Puffs
It's not totally accurate to say that I made Ham and Cheese Puffs yesterday. Actually, Kati made them and I "directed". And they came out good!

I used Elise's Simply Recipe method for Cheese Puffs. But I thawed out a little less than a pound of Christmas Ham from the freezer, diced it while it was still a little bit frozen and added it in with the cheddar cheese and fresh chopped rosemary.
It seems a little labor intensive when reading the recipe, but it's really not.
Heat oven to 425 degrees.
Place 1 cup of water, 1 stick of butter and 1 tsp. of salt in a small saucepan and bring to a boil over high heat. When it's at a boil, turn it down to medium and add 1 cup of flour, all at once, and stir like mad with a wooden spoon. It will get really thick and pull away from the side of the pot. That's fine, just keep stirring and cook for a few minutes.
Next you need to let it cool for a few minutes, stirring to make sure it cools evenly. I put it in my mixing bowl and let the mixer go on "stir" (low speed) for a few minutes. While it's still slightly warm, but not so warm that the eggs get cooked upon entry, mix in 4 eggs, 1 egg at a time. When they're in and it's looking creamy, add in 1 cup of cheddar, 1 cup of diced ham and about 1 Tablespoon of chopped fresh rosemary. Stir to combine.
Line two cookie sheets with parchment paper. Using a pastry bag or a scoop (I prefer the scoop method), dish out onto cookie sheets about an inch apart. Bake in the 425 degree oven for 10 minutes, then reduce the heat to 350 and bake for another 15 - 20 minutes, until nicely brown.
Cool slightly and devour!
Good job, Kati!
-J
Thursday, December 29, 2011
My Hammy Mac'n'Cheese and Garden Fresh Tomato Soup
Ham. Mac and Cheese. Tomato Soup.
 The trifecta of yummy. They harmonize like a bunch of carolers, don't they?
I had lots of leftover Christmas ham, some elbow macaroni, milk, and lots and lots of tomatoes from the garden. Picked up a block of medium cheddar cheese, and a great 2DG experience was on the way!
Now, I need to 'fess up here. I made the Hammy Mac'n'Cheese Tuesday night using the leftover Christmas ham. I used Elise's Simply Recipes version of Macaroni and Cheese, and it calls for a really interesting way to make it. Basically, you cook the elbow macaroni in milk, using about 2 cups of milk for each cup of macaroni. Sounds odd, I know, but I brought the milk just to a boil, put in the macaroni and simmered it for about 12 minutes, and diced up about 2 cups of ham. At about the 10 minute mark, I melted about 4 Tbs of butter and then added about 2 cups of shredded cheddar and grated some nutmeg and a little pepper. When it was good and melted and gooey, I added the ham and the cheese mix to the macaroni and stirred it all together. A good sprinkle of bread crumbs on top, then into the oven at 400 degrees for about 20 minutes. It was quite tasty!

On Wednesday, I worried that the cold snap we are having here in Orlando would be bad for all the tomatoes still on the plants out in the garden, so I went out and picked any that were at least beginning to turn pink. I came in with 1.25 lbs. of Juliets and 5.50 lbs of Romas. So...the ripest ones from that batch and the ones I already had in the house became soup, to go along with the Hammy Mac'n'Cheese.

I diced a medium/large onion and about 3 cloves of garlic. Browned these in some olive oil until they were soft, added the diced tomatoes. I didn't dice all of them...maybe a few pounds. I added about a cup of chicken stock, and then dissolved about a Tbsp of cornstarch in about a half cup of stock and set it aside. I let the soup simmer for a little while, then stirred in the reserved stock/cornstarch and some chopped fresh oregano, marjoram and basil. (I saved a little basil for a garnish.) I let it simmer on low for half an hour or so, then turned it off and let it cool a little bit before carefully purreeing it with a stick blender. I thought I'd need to strain it, but I didn't, so it was a slightly thickened.
I served it garnished with some ribboned basil and diced tomatoes. And the Hammy Mac'n'Cheese, of course!

Enjoy!
-J
Saturday, December 17, 2011
Fried 'Mater Sammich
Tomatoes. Tomatoes, tomatoes, tomatoes.
There are not many things on this planet I love more than fresh homegrown tomatoes. Yesterday I had a tomato sandwich for lunch. Just slices of a fresh ripe tomato on toasted whole wheat bread slathered with mayo. Mmmmm...
So tonight, it was Fried Tomatoes for dinner. Now, I know southerners use green tomatoes when they make Fried Green Tomatoes, but that's not for me. My mom used to make fried tomatoes using ripe tomatoes from our huge garden (usually about 200 tomato plants every summer, among all the other veggies), and she just dredged hers in flour seasoned with salt and pepper and fried til the outside was a little crisp.

I did that tonight, but I also took a different approach. After I dredged them in flour seasoned with salt and pepper, I dunked them in an eggwash and then coated them with panko breadcrumbs mixed with Mrs. Dash Seasoning.
Then I fried them in a hot skillet with vegetable shortening, and served them on a Martin's Potato Roll topped with shredded Mexican cheese mix. And allow me to add...Michael, who does not share my affinity for the tomato, ate his entire sammich, loved it, and said it was like a burger!
BTW...this does qualify as 2DG...the tomatoes were fresh from our garden, but the rolls were left from burger night, and the cheese from some fajitas.
Plate up and enjoy!
-J
Friday, December 2, 2011
Cheesy Biscuit Turkey Pot Pie
Here's a really excellent way to use up two types of leftovers...Thanksgiving turkey and last night's Baked Potato Soup.

First off, let me just say that the turkey I used for this dish was from Thanksgiving, but Michael had frozen it on Friday. I did not use turkey that was just hangin' out in the fridge for over a week for this dish!
Secondly, this is one of those double 2DG wins! I used last night's Baked Potato Soup in the filling for this dish.
Here's how it went...
Similarly to last night's soup, I cooked some chopped carrots, onions and celery in 3 T butter for about 10 minutes to soften them. I added some chopped fresh parsley, rosemary and oregano from the garden while the veggies were cooking. Then I sprinkled about 1/4 c. flour on them and stirring constantly, cooked the mix for about 2 minutes. I gradually stirred in 2 c. chicken/turkey stock combined into a nice gravy. then I added about a cup of last night's soup, and stirred it and let it thicken up. While that was simmering, I chopped up the remaining turkey and got about 3 - 4 cups out of it. This got added to the filling, along with a few handsful of frozen peas. Let the bubble away while the oven preheats and you work on the cheese biscuits.
If you don't have buttermilk on hand, make your own "sour milk" by putting 1 Tblsp vinegar or lemon juice (I used lemon juice) to a cup, and fill the cup with milk. Stir and set aside for about 5 minutes so it can "sour". Meanwhile, combine 2 c. flour, 2 tsp. baking powder, 1 tsp. baking soda, 1/2 tsp salt and 1/2 tsp. pepper. Add 1 c. shredded cheddar cheese and 1/4 c. parmesan cheese and toss to coat cheese mix with flour mix. Dice 3/4 stick of cold butter and combine with flour/cheese mix, using pastry knife or fingertips until mix is course.
Before you add the sour milk to the flour, get your filling into your baking dishes. I managed to get 3 good sized individual servings and 1 deep dish pie plate out of mine. When that's done and you're ready to put them in the oven, go back and finish the biscuit dough. I recommend this because the acid in the sour milk will activate the leavening power of the baking powder and soda, so I always wait until the last possible second to add the milk to the mix, since I don't want all the rising power of my biscuits to be used up before I even get them in the oven.
To finish the biscuit dough, add the sour milk to the flour/cheese mix and stir until just combined and a loose dough forms. Drop the dough by spoonsful (I use an ice cream scoop) onto the fillings in the dishes.
Bake in a 400 degree oven for about 35 - 40 minutes until the biscuits are nice and brown. I rotated mine front to back and top to bottom after 20 minutes to ensure even baking.
Mike asked me to make a few individual pies so he could give them to his grandmother and 2 friends, so I did that and also made a bigger one for the two of us. I filled all of the dishes at the same time, using a big ladle, to make sure I'd have them all relatively even. I also did all the biscuits at the same time too, to make sure they were all fairly even.


If you have any leftover cranberry relish, serve it up with this!
Enjoy!
Baked Potato Soup
It's a cold night. I have potatoes, celery, carrots and onions to put to use. So...Baked Potato Soup it is!
"Bake" 4 - 6 medium potatoes,about 1 1/2 pounds, in the microwave oven (pierce them all over with a fork first).
Chop about 1/2 cup each of carrots, onion and celery. Melt 1/2 stick of butter in a large pot over medium low heat. Put in chopped veggies, cover and cook until soft but not brown, about 10 minutes.
When potatoes are cool enough to handle,reserve two, peel the remaining potatoes, or leave some peel on, as desired, add to veggies and mash with a potato masher.
Stir in 1 c. chicken stock and 1 1/2 c. milk to veggies and potatoes, salt and pepper to taste. I also added a pinch of nutmeg. Let simmer for about 20 minutes.
While soup is simmering, cook 4 or 5 pieces of bacon in the microwave, covered with a paper towel, for 1 minute per slice. When cool, drain and crumble. Add about 2/3 of the bacon to the soup, along with about a Tablespoon of chopped fresh rosemary and the reserved baked potatoes, chopped. Continue to simmer until you are ready to eat, which should be fairly soon after smelling all of this! You may need to add about another 1/2 c. of milk prior to serving. (I did.)
Serve topped with a little more crumbled bacon and shredded cheddar.
Enjoy!
-J
Sunday, March 20, 2011
Tamale Pie
2DG is preparing to move to a new home, so my mission for the past few weeks is to use stuff up rather than move it, so I've been trying to clear out the pantry and the freezer. My philosophy is "I'm gonna carry this stuff one way or the other, so I may as well enjoy it!"
I've had a bag of masa harina in the pantry since I made enchaladas a while back, so this time I'm going to use it to make a dough for something similar to a deep dish pizza. I also used the remaining chicken sausage, ham and sliced portabella mushrooms I got to make Chicken and Wild Rice soup on Friday. I'm sure there's a better name for it, but I'm calling it a Tamale Pie.

 Lightly oil a deep dish pie pan, and sprinkle with some masa harina and/or some cornmeal. I tried to roll the dough out, but it wasn't really roll-able, so I put it in the pie pan and pushed it with my fingers to shape it.
 I put about half a can of enchilada sause down next, and then put in the sausage/veggie/ham mixture. Now it's time for the remaining chopped veggies. Put in the rest of the sauce and now it's oven ready!

I've had a bag of masa harina in the pantry since I made enchaladas a while back, so this time I'm going to use it to make a dough for something similar to a deep dish pizza. I also used the remaining chicken sausage, ham and sliced portabella mushrooms I got to make Chicken and Wild Rice soup on Friday. I'm sure there's a better name for it, but I'm calling it a Tamale Pie.

To make the dough, I took 2 cups of masa harina, mixed it with 1/2 cup of all purpose flour, 2 tsp. Adobo seasoning and 2 tsp. baking powder. I added 2 Tbsp of olive oil, and slowly worked in almost a cup of water to form a dough. Once it held together, I tried to knead it a little bit, but it wasn't really cooperating, so I put it back in the bowl to rest while I prepped the rest of the ingredients.
Preheat the oven to 425 degrees. Heat about a Tbsp of olive oil in a skillet. Crumble the sausage in a skillet without the casing and let it brown. Be sure to tend it and stir it occasionally to prevent it sticking. Chop half a green bell pepper and a small onion. When the sausage is nearly browned all the way, put about half a cup of sliced mushrooms, half the chopped pepper and onion in with it to brown, reserving the rest to go in the pie au natural. Chop about half of a medium tomato and set it aside. When the sausage and veggie mix is pretty well cooked, I put about a cup of diced ham in just to warm it up a bit. Once that's done, turn off the heat and let the mixture hang out and wait til you're ready for it.
 Lightly oil a deep dish pie pan, and sprinkle with some masa harina and/or some cornmeal. I tried to roll the dough out, but it wasn't really roll-able, so I put it in the pie pan and pushed it with my fingers to shape it.
  I put about half a can of enchilada sause down next, and then put in the sausage/veggie/ham mixture. Now it's time for the remaining chopped veggies. Put in the rest of the sauce and now it's oven ready!
Let it bake for about 15 minutes, then pull it out and top it off with a mix of Mexican cheeses, and put it back in for another 10 minutes or until the cheese is all nicely melted.
Pull it out when the cheese is melted and the crust is brown. Let it rest for 10 - 15 minutes, then dig in!
Enjoy!
Friday, February 4, 2011
Pasta Primavera with Chicken Sausage
Thursday, December 30, 2010
Deep Dish Pizza
Man o man, where has the time gone?? No posts since the beginning of December and here it is the end of the year! My new year's resolution will be...to be more dedicated to 2nddaygourmet!
So...I was cleaning out the fridge, again, and came up with this little beauty...


So...I was cleaning out the fridge, again, and came up with this little beauty...

I picked up a multi-grain pizza dough at Publix bakery. It's the same dough they use for their multi-grain Italian bread, and it's yummy! Oh another resolution...I will make my own pizza dough in 2011.
I got some plain breakfast sausage, some mozzerella and provolone cheese and used stuff from the fridge for the rest of the fillings. I browned the sausage and doctored it with some of Mike's seasoning mix that he makes, added some fennel seeds and some garlic to the sausage as it browns. Then I added the remenants of an onion, some spring onions and some leftover sliced portabella mushrooms to the skillet. Finally I added, a little at a time, a bag of fresh spinach that was in the fridge and let that cook down.
After the dough had risen for an hour or so, I put it in the 10 inch deep dish pie plate that I had coated with olive oil and sprinkled with cornmeal. Then I added provolone slices and mozerrella on top of the dough. The point is to build a pizza backwards from what you would normally do, so you're adding stuff in the reverse order of what you would typically do for a pizza. Next I put in the sausage/spinach/mushroom/onion combo. You can add these one at a time in layers if you want. I found the last time that cooking the sausage and spinach together worked really well, so I add the rest of the stuff this time too.
Next I added a grated carrot and a half zucchini that I'd cubed, and salted and peppered everything. At this point I'd use a can of crushed tomatoes, but I had a bunch of grape tomatoes and some roma tomatoes (Romas from our GARDEN!) so I chopped them up and put them on and sort of crushed them with my hands when adding them. Then I sprinkled some chopped fresh oregano, marjoram, parsley, thyme and basil on top of the tomatoes, and some more salt and pepper.
Finally I sprinkled some grated parmesan cheese and put it in a 450 degree oven for 20 minutes. I added a little more mozerrella after 20 mins and put it back in for 3 - 5 minutes til it got all nicely melted and gooey.
After sitting for a while, this is what a slice looked like...

Mmmmmmmmmmmmmmmmm!
Enjoy!
-J
Wednesday, August 18, 2010
Fried Mac'n'cheesecakes
Michael made some really good mac'n'cheese the other day. There was a little left, so we tried making FRIED Mac'n'cheesecakes with it. They turned out really good!
1. Beat an egg with a small amount of milk in a shallow bowl to make an eggwash. Add a tiny touch of tobasco sauce and some salt and pepper.
2. Put some breadcrumbs in a second shallow bowl. (I used panko, but I'm sure regular will work just fine.) Season the breadcrumbs with salt and pepper or some seasoned salt.
3. Portion the cold mac 'n cheese into small balls, about the size of golf balls. Roll them in the breadcrumbs, then in the eggwash, then in the breadcrumbs a second time.
4. Gently flatten the mac 'n cheese balls slightly with your hand, so they're about the size of a hamburger.
5. Put some vegetable shortening or vegetable oil in a skillet, cast-iron if you have one, over medium - high heat. While the oil is heating, put a few unpopped kernels of popcorn in the skillet. You'll know the oil is hot enough for your mac 'n cheese cakes when the corn pops!
6. Remove the popped popcorn from the skillet, if it has not already ejected itself like mine did. Carefully place the mac'n'cheesecakes in the skillet and let them fry for 2 or 3 minutes until they are nice and golden brown. Carefully flip them over and let them go for another few minutes.
7. Remove the mac'n'cheesecakes to a small plate lined with paper towels. If not eating right away, cover with another paper towel. Since you're using really hot oil, they won't absorb a lot of oil, so you won't absorb a lot of oil, but it's still nice to blot up any extra with the towels.
8. We served ours with grilled meatloaf, hashbrowns (two more 2DG creations) and peas. Enjoy!
Saturday, June 19, 2010
Shepherd's Pie
First off, I need to say that technically, what you're about to see is Cottage Pie since it's made with beef, and not Shepherd's Pie, which is made with lamb. That said, I think "Shehperd's Pie" is a more well known name here in the U.S., so that's what I'm calling it.
This has to be one of the greatest "clean out the fridge" dishes you'll ever find. This particular incarnation began its life as Salisbury Steak with mushroom and onion gravy, served along with mashed parsnips/potatoes. Up to this point, I'd always made Shepherd's Pie out of left over meatloaf and mashed potatoes, so using Salisbury Steak seemed like a natural progression.
Here's the finished dish...isn't it pretty? I like to make "individual pies" for each person (and believe me, neither of us ever finishes one at one sitting, so they make great lunches the next day too!), so I use my stoneware bowls, since they are oven-safe.


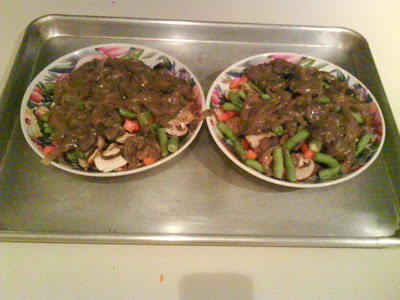

One thing I do differently than most Shepherd Pie creators is top the potatoes with some cheddar cheese. I mean, how can adding cheese to meat, veggies and potatoes be a bad thing??


This has to be one of the greatest "clean out the fridge" dishes you'll ever find. This particular incarnation began its life as Salisbury Steak with mushroom and onion gravy, served along with mashed parsnips/potatoes. Up to this point, I'd always made Shepherd's Pie out of left over meatloaf and mashed potatoes, so using Salisbury Steak seemed like a natural progression.
Here's the finished dish...isn't it pretty? I like to make "individual pies" for each person (and believe me, neither of us ever finishes one at one sitting, so they make great lunches the next day too!), so I use my stoneware bowls, since they are oven-safe.

Now, how'd it go together?
First...I chopped the leftover salisbury steak paddy into cubes and distributed it in the bottom of the bowl. I've found that using one whole piece of meatloaf, or in this case, one whole steak paddy meant that the first few bites around the edge of the bowl may not have much, if any, meat in them.This way fixes that problem!
Next I put some chopped fresh carrots, green beans and leftover mushrooms on top of the steak. Usually I use frozen mixed veggies, but since I had fresh stuff on hand, I used them instead. This meant it had to bake a little longer in the oven, but that's ok.
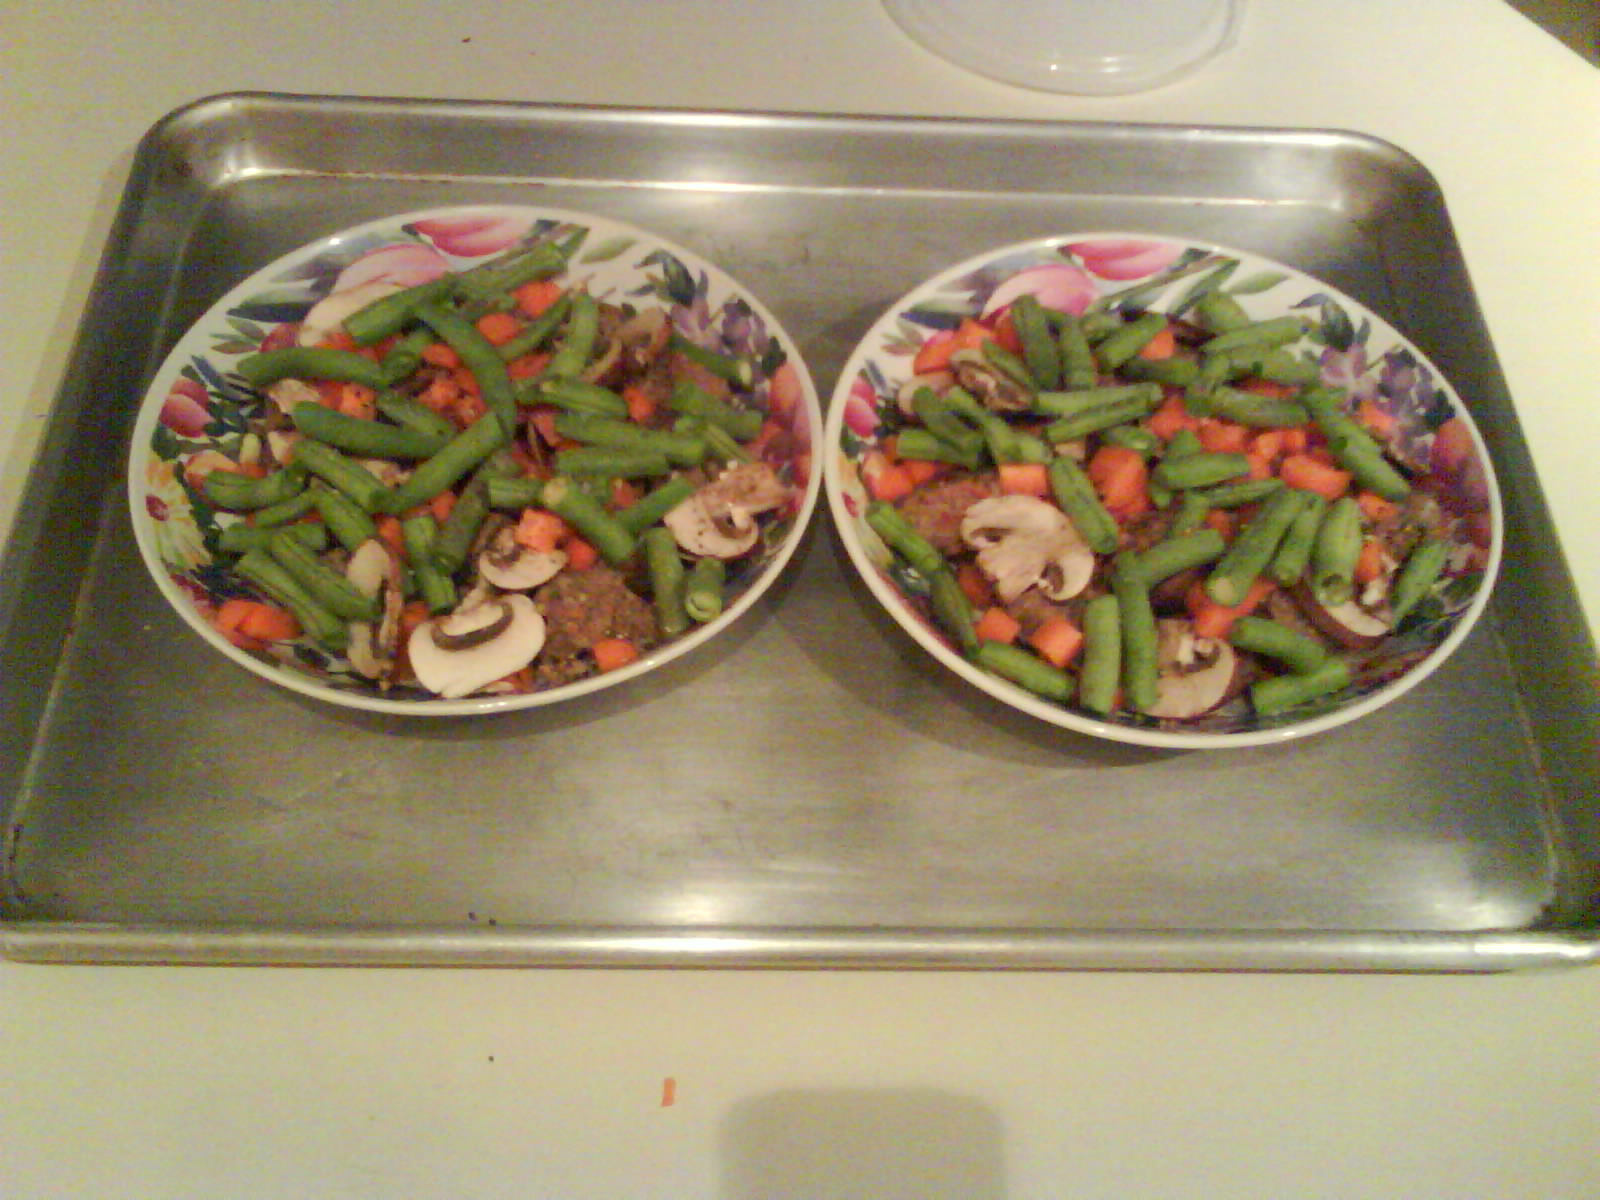
Now for the mushroom and onion gravy from the salisbury steak meal. I wish this came across better in a picture, but it is what it is!

I had never had parsnips before, and wanted to try them, so I added them in with the potatoes when I made mashed potatoes to go along with the salisbury steak. They were very tasty! I will be using them again in the future. But for now, I took the leftover mashed parsnips and potatoes, and generously spread them on top of the pies. I feel it's important to get a good "seal", so be sure to get the pototoes all the way to the edge of the bowls!

One thing I do differently than most Shepherd Pie creators is top the potatoes with some cheddar cheese. I mean, how can adding cheese to meat, veggies and potatoes be a bad thing??

And here it is again, after being baked at 350 degrees for about a half an hour. After that, I turned the broiler on over them to brown the cheese and potatoes a little bit. KEEP AN EYE ON THEM WHILE THEY'RE UNDER THE BROILER!!! You want them slightly browned, not charred!

And in case you're wondering, here are two pictures of the Salisbury Steaks from which this 2nd Day Gourmet meal originated.


Saturday, June 12, 2010
Mahi Mahi Burrito
Thursday evening, Michael surprised me with a beautiful dinner when I got home from work. He had prepared Mahi Mahi served on a bed of wild rice with a fantastic compote/slaw made of mandarin oranges, pineapples, corn and tomatoes. It was delicious!
So, thought I on Friday...this could be the first entry on 2nd Day Gourmet! Looking in the fridge, I found tortillas left from some meal in the past, tomatoes and onion left from making guacamole, lettuce from various salads, some sharp cheddar cheese, the compote and of course the mahi and wild rice.
Here are the players:

So I decided I would make a Mahi Mahi Burrito, taking inspiration from the fish taco.
1. First I prepped each of the players. Here's my mise en place, with all my little soldiers ready to step up.

2. Next I placed some of the wild rice in a small skillet to gently heat up over medium heat, and when it was warm, I added the chopped mahi mahi to the pan to slightly warm it.

3. I covered the pan and turned my attention to the rest of my players. I lined them all up with a tortilla on each plate, ready for the build.

4. And now the build:
First...the wild rice and mahi mahi.

Next, the cheddar

Now for the tomatoes, and onions. Sorry, the lettuce covered everything up, so I decided to leave that picture out.

And now, finally, the finished plate...the Mahi Mahi Burrito topped with fruit compote, with a side of macque shoux.

Thanks for looking in on my creation. Let me know what beauties you are creating from your lovely leftovers!
Subscribe to:
Posts (Atom)